
How to Master Spatchcock Chicken Pellet Grilling in 5 Steps
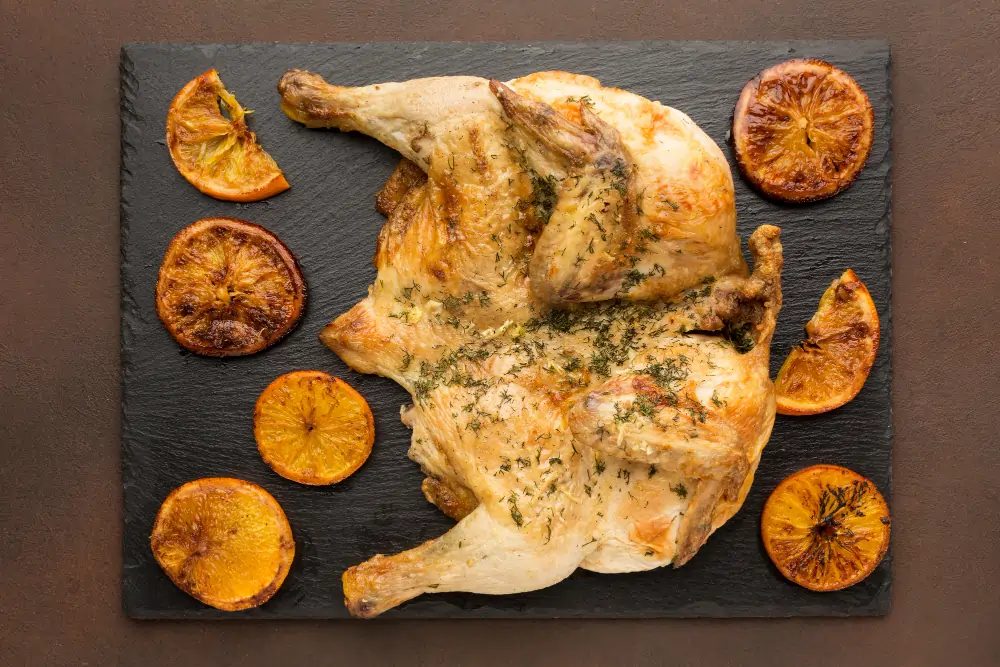
Table of Contents
If you want to surprise your friends or just cook a Sunday family dinner, learning to grill spatchcock chicken on a pellet grill is a game-changer. Spatchcock chicken—also known as butterflied chicken—is a cooking technique where you remove the backbone so the chicken lies flat, cooking more evenly and in less time. When paired with the superior heat control and smoky flavor of a **pellet grill**, it delivers juicy meat and irresistibly crispy skin every time.
The main reason to choose Pellet grills blend the set-it-and-forget-it ease of gas with the deep flavors of wood. They cook at a precise, consistent heat, infuse your chicken with a smoky aroma, and make it easy to master the art of grilling. No more dry breast meat or underdone thighs—just perfect, evenly grilled spatchcock chicken every single time.
Curious about the benefits?
- Faster cook time (thanks to the flat shape)
- Even heat distribution (juicier results)
- Ultra-crispy skin (everyone’s favorite!)
Ready to grill spatchcock chicken like a pro on your pellet grill? Let’s do it now but before subscribe in our newsletter to stay tuned with our weekly recipes and cocking tips.
Step 1: Gather Your Equipment
Before you grill spatchcock chicken, assemble the right equipment, you’ll use it again and again.
Here’s what you’ll need:
- Pellet grill: I recommend the Traeger Pro Series 22 Pellet Grill and the Camp Chef Woodwind WiFi 24, both offer excellent heat control and reliability.
- Sharp kitchen shears: For spatchcocking (butterflying) the bird.
- Meat thermometer: Digital, instant-read is best for food safety.
- Cutting board: Choose one with grooves for juices.
- Pellets: For the best grilled spatchcock chicken, use mild woods (apple, cherry, pecan) for chicken. Hickory is great for a smokier flavor, but avoid mesquite, which can overpower delicate chicken flavor.
Affiliate Disclosure: As an Amazon affiliate, I earn from qualifying purchases.
Step 2: Prepare the Chicken
How to Spatchcock a Chicken (Butterfly Technique)
Spatchcocking may sound fancy, but it’s simple, and crucial for the best *grilled spatchcock
Step-by-Step:
- Pat the chicken dry with paper towels.
- With the chicken breast down, cut out the backbone using sharp kitchen shears. Start at the tail and cut along both sides of the backbone, from the tail to the neck.
- Remove the backbone completely (save it for stock!).
- Flip the chicken over and press down hard on the breastbone; you’ll hear a crack. Now your chicken lies flat.
Seasoning Recommendations
The spatchcock method exposes more skin, more opportunity for crispy, flavorful bites! Use a dry rub or marinade:

Simple Dry Rub Recipe:
- 2 tbsp olive oil (to coat)
- 1 tbsp kosher salt
- 1 tsp black pepper
- 1 tsp garlic powder
- 1 tsp smoked paprika
- 1/2 tsp dried thyme
- 1/2 tsp brown sugar
Combine and sprinkle over both sides.
Marinade Option:
- 1/4 cup olive oil
- 2 tbsp lemon juice
- 1 tbsp chopped rosemary
- 2 garlic cloves, minced
- Salt, pepper to taste
Marinate for 2-8 hours.
Step 3: Pellet Grill Setup and Preparation
Temperature and Pellet Selection
- Preheat pellet grill to 375°F–400°F, ideal for spatchcock chicken pellet grill recipes.
- Pellet types: Fruity woods like apple or cherry give mild, sweet smoke perfect for chicken; pecan offers a richer taste.
Preheating & Indirect Heat Method
Preheat with the lid closed for at least 15 minutes for stable heat and smoke production. Set up for indirect grilling by placing a drip tray under the grill grate, if possible. This prevents flare-ups and ensures even heat, all critical for perfect grilled spatchcock chicken.
Step 4: Grilling Technique
Placement and Cooking Times
- Lay chicken skin-side up on the center of the preheated grill. Tuck wing tips under.
- Close the lid and let the smoke and heat do the work.
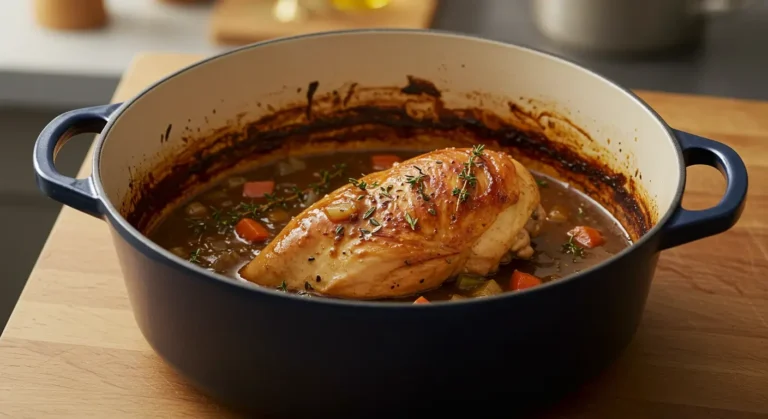
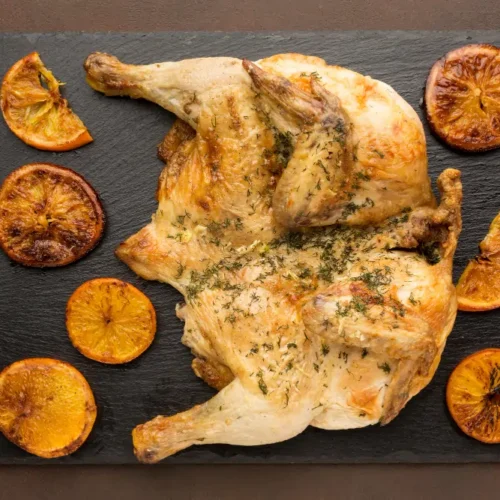
- Cooking times: For a 3.5–4 lb spatchcock chicken, cook 35–50 minutes at 375°F–400°F. Always check doneness via internal temperature, not time.
Achieving Crispy Skin
- Leave the bird uncovered for most of the cook.
- Use higher-end of temp range (400°F) for extra crisp.
- No basting, let the skin dry!
- For extra crisp 5 minutes at the end, crank temp to 425°F.
Monitoring Temperature
Insert a probe into the thickest part of the breast (don’t touch bone). Your target:
- 165°F in the breast
- 175°F in the thigh
For food safety, always use a reliable thermometer according to USDA guidelines.
Step 5: Resting and Serving
Why Resting Matters
Let the chicken rest, tented loosely with foil, for at least 10-15 minutes. This lets juices redistribute, preventing dry meat.
Carving Spatchcock Chicken
- Using a chef’s knife, slice legs, thighs, and wings from backbone.
- Separate drumstick from thigh.
- Slice breast meat into strips. Arrange on platter for serving.
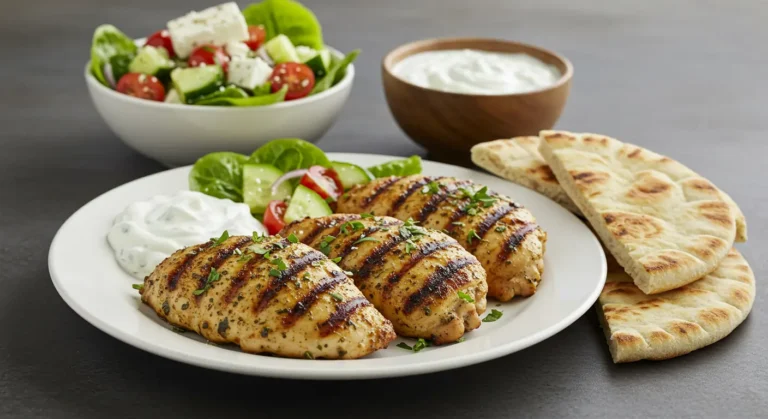
Serving Suggestions
- Pile chicken on a board with grilled vegetables
- Serve with fresh herbs, lemon wedges
- Great sides: Grilled corn, potato salad, or classic coleslaw.
Pro Tips and Tricks
- Common mistake: Not drying the chicken, wet skin won’t crisp!
- Flavor variation: Add zest of lemon, orange, or smoked chili powder to your rub for a twist.
- Storage: Leftovers keep 3–4 days in fridge. For the best reheating, warm gently in a 300°F oven for 10–15 min; cover loosely with foil.
- Freeze carved portions up to 3 months.
Nutrition and Health
- Spatchcock chicken delivers lean, high-quality protein with fewer calories when cooked skin-on but not drenched in oil.
- Pellet grilling reduces the need for added fats and gives natural flavor via wood smoke.
- It’s a balanced, family-friendly main course loaded with B vitamins and minerals.
Recap:
Mastering spatchcock chicken pellet grilling is about technique, patience, and the right setup. Spatchcocking gives you quick, even cooking. Pellet grilling brings wood-fired flavor and reliable heat. Follow the steps, and you’ll create show-stopping, juicy, crispy-skinned *grilled spatchcock chicken* every time.
Give it a try! Share your spatchcock experience in reviews, tag us in your chicken pics, or submit your favorite seasoning twist. And don’t forget to check out our chicken recipes.
FAQ
1. What is spatchcocking? It’s a technique where you remove the backbone of a chicken and flatten it for faster, even cooking.
2. How long does it take to grill a spatchcock chicken? Usually 35–50 minutes at 375°F–400°F, depending on chicken size and grill.
3. What pellets work best for chicken? Apple and cherry give a sweet, mild smoke. Pecan has deeper, nuttier flavor without overpowering the chicken.
4. Can I use this spatchcock method with other poultry? Absolutely, turkey, guinea hen, and Cornish hens work great!
Disclaimer: Cooking times may vary based on grill model, pellet type, and chicken size. Always use a meat thermometer for food safety!
Spatchcock Chicken Pellet Grill Recipe
Equipment
- 1 Pellet grill
- 1 Sharp kitchen shears
- 1 Meat thermometer
- 1 Cutting Board
- Pellets
Ingredients
- 1 whole chicken 3.5–4 lbs
- 2 tbsp olive oil
- 1 tbsp kosher salt
- 1 tsp black pepper
- 1 tsp garlic powder
- 1 tsp smoked paprika
- ½ tsp dried thyme
- ½ tsp brown sugar
- Optional: lemon wedges & fresh herbs for garnish
- Wood pellets apple, cherry, or pecan recommended
Instructions
Prep the Chicken
- Pat chicken dry with paper towels.
- Place breast-side down. Using kitchen shears, cut along both sides of the backbone to remove it.
- Flip the chicken and press down the breastbone firmly to flatten.
Season
- Brush chicken with olive oil.
- In a bowl, mix salt, pepper, garlic powder, paprika, thyme, and brown sugar.
- Rub seasoning all over both sides.
Preheat Grill
- Preheat pellet grill to 375–400°F (190–200°C) using apple, cherry, or pecan pellets.
Grill Chicken
- Lay chicken skin-side up on grill grates, tucking wing tips under.
- Close lid and cook 35–50 minutes. Check temperature after 35 minutes.
- Cook until breast reads 165°F (74°C) and thigh 175°F (80°C) with meat thermometer.
Rest & Serve
- Remove chicken and rest 10–15 minutes, tented with foil.
- Carve and serve with sides of your choice.
Notes
- Ensure chicken skin is dry for crispier texture.
- For extra crisp, finish at 425°F for last 5 minutes.
- Save backbone for homemade stock.
Loved This Recipe? Rate It & Let Us Know!
There are no reviews yet. Be the first one to write one.